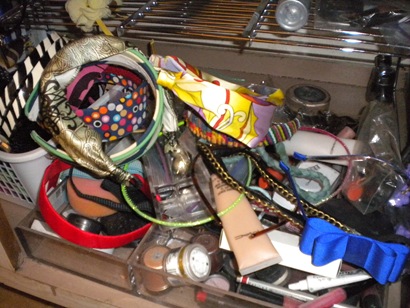
A few months ago, I showed you guys this quick and easy DIY headband storage system. Since then, I’ve been dying to show you my jewelry organization system, but with our cross country move, I sort of put it on the backburner. But now that we’re settled and moved in, backburner be gone!
But before I get to the good stuff, let me tell you a few of my life mantras:
- Pretty things should be shown off.
- Ordinary things should be stored in pretty things.
- You’ll use things more if you can see them.
- Home organization should not cost a fortune, unless its Container Store Elfa shelving. Then I’ll make an exception :)
- Have alot of jewelry. Some of mine is vintage, some is fancy, some is plastic, some is blingy, and some is from Target. It doesn’t matter where its from, just as long as you love it.
So with those rules in mind, here is how I organize, store, and show off my jewelry…
 This is the wall opposite the mirror in my bathroom.
 Here is one of the three ways I store earrings. These are for earrings that have a hook back. I’ll show you how to make this earring frame later in the post. It’s super simple.
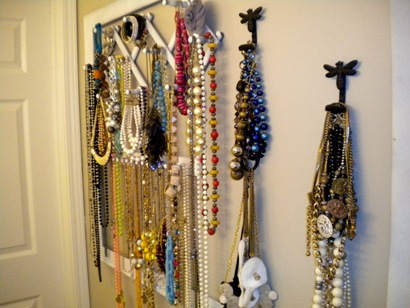 These hooks are for my necklaces. There are 3 different “fixtures” here, and I’ll show you each one individually. I should also mention that every hook, container, and peg you see was purchased secondhand at a flea market, thrift store, or garage sale. Their are two exceptions which I’ll point out when I show them.
 The top part of the necklace organization is some odd accordion hook thing I found for 50 cents at Goodwill. I think its original purpose had something to do with laundry drying, though I’m not entirely certain. It can be stretched or squeezed to almost any length you need, and I wanted mine so I could fit short necklaces on the top row without having them drape too far over the third row of pegs. This was originally a yucky brown wood color which I spray painted white.
 The second part of the necklace wall is this long row of pegs, which my mom snagged for me at a garage sale for 25 cents. The wood color was a honey color, so I sprayed it white to match the one above it. I had originally wanted to hang one necklace per peg, but given my insane amount of jewelry, that idea quickly went out the window, and its been fine doubling and tripling up.
 The third and final part of the necklace storage were these 4 bumblebee hooks, which I found for $1 at a garage sale. They were too cute to pass up, and I’m so glad I didn’t. I just staggered them and screwed them into the wall. Easy peasy. Originally, I had planned to stop there, but I thought the whole thing looked a little too scattered. So Matt had a great idea to border the whole thing with this oversized frame I got at a flea market for $1. It really helped tie the whole thing together, though if you don’t have as many hooks as I do, I think you could skip this step.
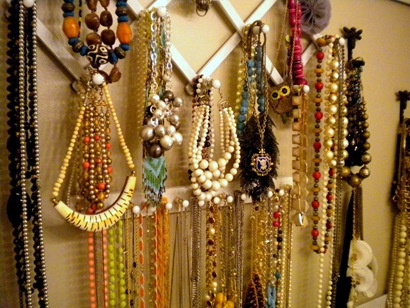 For me, this wall is function and beauty, a rare but fabulous combination! PS: can I tell you how much I adore that little owl necklace towards the top right corner. I got it at a market in London with my mom, and it instantly makes me happy when I wear it :) Another perk of this wall is that I can see it while I’m putting my makeup on and drying my hair. Therefore, I can think about what I’m wearing that day and what accessories I want to pair with it as I get ready.
 Here is the right side of my bathroom counter. Like I said above, I believe in storing ordinary things in pretty containers, so my cotton balls and q-tips are stored in glass canisters, my bobby pins and cuticle scissors in a votive holder, and my makeup brushes in a glass beaker (like at the MAC store.) All of these glass pretties came from Goodwill for under $2. The ceramic fleur-de-lis holds my hair ties and was purchased from the clearance shelf at Steinmart. The fleur-de-lis is my sorority’s symbol, so I love finding ways to incorporate it into my stuff. And of course, I have to have a picture with my fabulous little brother :)
 My cocktail rings are in a vintage ice cream dish found at a flea market, and my “real” jewelry (aka wedding ring, Yurman, diamond studs from Matt, etc.) sits in this crystal ring holder which I picked up for $3 at a consignment show. My Forever 21 flower bobby pins make a fun little bouquet in a 99 cent Goodwill votive holder.
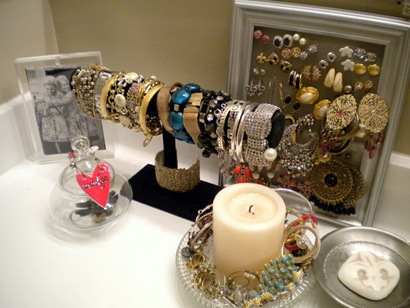 Here is the left side of my bathroom counter. My most worn bracelets sit on this velvet lined bracelet holder. My mom snagged this for me at a garage sale, and I’ve never seen another one since, though my eyes are forever peeled for one. As you can see, this one is getting a little full :)
 This silver earring frame is made just like the other one I showed you, but this one is for earrings with post backs. It doesn’t hang on the wall, because you need easy access to the back of the frame to put the earrings on and off the holder. If you don’t have a ton of earrings, you can totally put post back and hook back earrings on one frame, you just have to deal with a couple of falling hook back earrings every now and then. The frame is actually plastic and is from the dollar store.
 I got this vintage ashtray from my grandma, though I’ve seen them countless times at thrift stores. These are for earrings with loop backs. You know, the ones that hook in and then close shut to form a complete oval. (Who knew earring terminology was so advanced?) These have to lay loose because the backs won’t close in the frames I have my other earrings on. I stuck a candle in the middle, though I don’t light it too often. I learned my lesson about that here :)
 Ever wonder what to do with all those extra buttons that come with sweaters, blazers, etc? I place mine in this pretty glass container found at Goodwill. Easy access when I buy the article of clothing, and easy access should I need the button. I put this little heart from my mom around the top to make me smile every morning :) And of course a picture with my bestie is tucked away in the corner!
Sooooo…I realize I have a lot of jewelry, and I realize this whole big thing may not be for everyone, but…perhaps you want to make your own mini version. And since you’re interested…here’s a quick and easy (I swear its both) tutorial for the earring holders. I’ve made them several times, and assure you, even the most craft challenged person can do it. (I know this because I am the most craft challenged person on the planet!)
 Ok…here is what you need. Frames of whatever shape and size you desire. These are super cheap at Goodwill and you may even have some laying around your house. You do NOT need the glass or a mat, so don’t bother paying for that. And don’t worry about color either, they make paint for that :) I started out with this leftover can of Gripper paint, but I later switched to spray paint. I’m inpatient like that. The key thing you’ll need to buy is the “netting.” I don’t know what this stuff is really called, but it can be found at your local home improvement mega store in the screen door aisle. It looks like a giant roll of graph paper, only made out of wire/metal. They sell it by the roll, but if you’re lucky, you can find a roll that is already open and barter with the guys at the store who wonder what the hell you’re gonna do with it. I got my already opened and half used roll for $2. You’ll also need a glue gun, and if you’re working at your kitchen table like me, you’ll need a dropcloth. (Note: this is NOT our table cloth, it is our ugly drop cloth. Matt paints a lot and therefore ours has a lot of use.)
 Step 1 (which I failed to photograph): Paint the frame. Step 2: Trace the frame opening onto the mesh/metal screen door stuff. If your frame doesn’t have the back to it, no worries, just trace the opening to the frame. When unsure, go a little bigger and trim down as necessary.
 Step 3: Push the mesh/metal screen door stuff into the backside of the frame. Step 4 (which I did not photograph): Hot glue the shiz out of it. Lol, I know there are crafty bloggers out there who will hate my directions, but its the best I’ve got. You won’t see the back so don’t bother making it pretty. Mine have gobs of glue all over the back and not a soul can tell :)
 Step 5: Hang the newly finished jewelry frame on the wall or leave it free standing like my silver one. Whichever you prefer and whichever fits with the type of earrings you have.
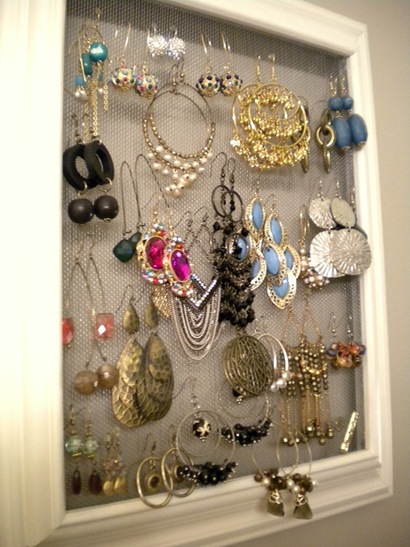 Step 6: Hang your favorite jewels from it and enjoy your fabulous pretties!
Seeee, SUPER easy! If you’re not up for thrift store shopping or if want the instant gratification, you can always find hooks and pegs at Target, Walmart etc. They’ll be a little more expensive but will also come with less work.
So…I know this was a long post (sorry!) but what do you think? Anyone going to give it a try?? If you do, PLEASE let me know; I love to hear! Even better, I’d love to see! Send me a picture and maybe I’ll post it on my blog!
How do you store your pretties?